
Key Points
- A successful water softener installation starts with two things most homeowners skip: testing your water hardness and calculating your daily water usage — both determine the right softener capacity for your home.
- According to the U.S. Geological Survey, approximately 85% of U.S. homes have hard water — making water softener installation one of the most impactful plumbing upgrades available.
- Always turn off the main water supply before beginning installation — and open a low faucet to relieve residual pressure before cutting any pipes.
- The bypass valve is one of the most important components — it allows you to isolate the softener for maintenance without shutting off water to the entire home.
- Salt type matters: evaporated salt is the purest and most efficient option; solar salt is highly soluble; rock salt is economical but requires more frequent cleaning.
- Regular monthly maintenance — checking salt levels, cleaning the brine tank, and testing water hardness — keeps your system performing efficiently for years.
- Not comfortable with any of these steps? Desert Water Plumbing and Rooter can handle the full installation safely and correctly.
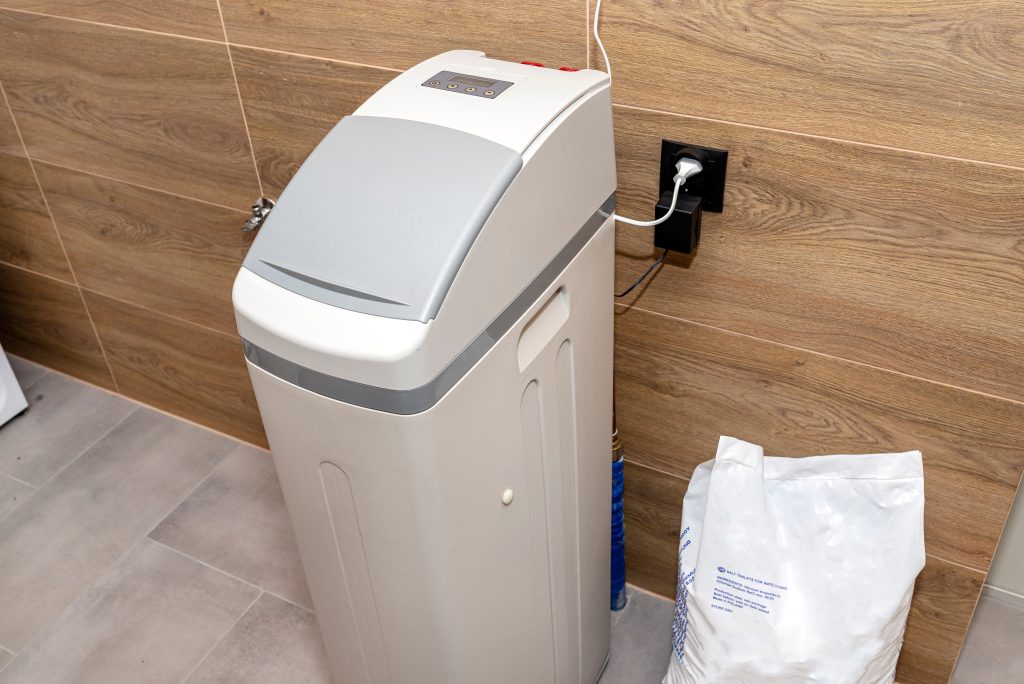
Imagine assembling a complex jigsaw puzzle without first sorting the pieces — installing a water softener without proper steps can feel just as chaotic. To avoid this, approach the installation process methodically. Begin by evaluating your water needs and selecting the right softener for your household. Gather all necessary tools and make sure your workspace is safe and organized. After turning off the water supply, carefully install the bypass valve and connect the softener to your plumbing. Here’s everything you need to know for a successful installation.
Assess Your Water Needs
To determine the appropriate water softener for your home, you need to assess your household’s daily water usage and the hardness level of your water supply. Begin by performing a water analysis. This involves testing your water to measure its hardness, typically indicated by calcium and magnesium ions concentration. You can perform this test using a home testing kit or sending a sample to a certified laboratory. Understanding your water hardness is important, as it directly impacts the type and size of water softener you’ll need.
Next, calculate your household’s daily water usage. This can be done by multiplying the number of people in your home by the average water used per person daily, usually around 75 gallons. For instance, a family of four would consume approximately 300 gallons daily. Knowing your daily water usage helps in selecting a softener with the right capacity to handle your needs effectively.
Choose the Right Softener
Selecting the right water softener involves evaluating different models based on their capacity, type, and features.
Softener capacity is critical — it determines how much hardness the unit can handle before regeneration is required. Multiply your household’s daily water consumption by the water hardness level to find the right capacity for your needs.
Types of water softeners to consider:
- Ion exchange softeners — the most popular and effective option for most homes
- Salt-free alternatives — worth considering if you’re concerned about sodium intake or environmental impact
- Dual-tank systems — ideal for continuous soft water supply without downtime during regeneration
Look for additional features such as demand-initiated regeneration, which optimizes water and salt usage based on actual consumption rather than a fixed schedule. You may also want to explore water filtration or reverse osmosis systems as complementary water treatment options for your home.
Gather Your Tools and Prepare Your Workspace
Before beginning, gather all necessary tools and organize your workspace. A clutter-free area reduces the risk of accidents and keeps the installation efficient.
Essential tools:
- Pipe cutter, adjustable wrench, and pliers
- Tape measure and level
- Soldering kit (torch, flux, and solder) — if your installation involves copper pipes
- Teflon tape for threaded connections
- Screwdrivers and utility knife
Safety gear:
- Gloves, safety glasses, and sturdy footwear
- Bucket and towels nearby for any water spills
Before starting — check tool quality: Inspect all tools for wear or damage. A worn pipe cutter produces uneven cuts that lead to leaks. Verify that torque wrenches are calibrated correctly — over-tightening can damage fittings. Rust-free, smoothly operating pliers and wrenches make precision adjustments far easier.
Turn Off the Water Supply
Locate the main shutoff valve — typically found in the basement, crawl space, or utility room near where the main water line enters your home.
Two common valve types:
- Gate valves — turn the wheel clockwise until it stops
- Ball valves — rotate the handle 90 degrees to the off position
Once the main supply is off, open a faucet at the lowest point in your home (a basement sink or outdoor spigot) to relieve residual water pressure and drain the remaining water from the pipes. If your home has a water heater, also turn off its cold water supply valve to prevent backflow.
Double-check that no water flows from any faucets before proceeding. If you’re unsure about your home’s plumbing layout, a plumbing inspection can help identify shutoff valve locations and any existing issues before installation begins.
Install the Bypass Valve
The bypass valve is a critical component — it allows you to isolate the water softener for maintenance or repair without disrupting your entire home’s water supply.
Installation steps:
- Position the bypass valve — align it carefully with the inlet and outlet ports of the water softener; misalignment causes leaks and operational failures
- Secure the valve — attach using the provided couplings and tighten all connections firmly
- Check for proper sealing — apply plumber’s tape or sealant to all threaded connections before attaching to prevent leaks
A correctly installed bypass valve allows smooth transitions between maintenance and normal operation — protecting both the system and your household’s water supply.
Connect to Your Plumbing
Identify the main water supply line where the softener will connect — choose a location that allows easy access for future maintenance.
Connection steps:
- Confirm pipe compatibility with your softener’s fittings — most units connect to standard plumbing sizes, but always verify
- Cut into the main water supply line using a pipe cutter, ensuring a clean, straight cut
- Install the necessary fittings and connectors per the manufacturer’s instructions
- Apply Teflon tape to all threaded connections for a watertight seal
- Attach the softener’s inlet and outlet pipes to the corresponding fittings — tighten firmly but avoid over-tightening
- Slowly turn the main water supply back on and check every connection point for leaks
If you notice any leaks or moisture around connections after turning the water back on, water leak detection services can pinpoint the source quickly before damage occurs.
Add Salt and Test the System
With plumbing connections secure, add salt to the brine tank and test the system.
Salt types compared:
- Evaporated salt — purest and most efficient; recommended for most systems
- Solar salt — highly soluble, a good mid-range option
- Rock salt — most economical but may leave deposits that require more frequent brine tank cleaning
Testing steps:
- Fill the brine tank to approximately half-full with your chosen salt type
- Initiate a manual regeneration cycle per your unit’s manual — this flushes air from the system and primes it for operation
- Use a water hardness test kit after the cycle completes to confirm hardness has been reduced to the desired level
Set a reminder to test water hardness monthly — consistent testing helps you catch any efficiency drops early and adjust salt levels as needed.
Inspect and Maintain Regularly
A water softener that’s properly installed but poorly maintained will underperform over time. Build these habits into your routine:
- Inspect the brine tank monthly — check for salt bridging (a hardened crust that prevents brine formation) and clear it if present
- Clean the brine tank periodically — use water and dish soap to scrub out salt deposits, then rinse thoroughly
- Monitor resin bead performance — a decline in water quality may indicate the resin needs recharging or replacement
- Check salt levels — keep the tank approximately half-full for consistent performance
- Inspect the control valve and settings — confirm programming matches your household’s actual water usage
Regular maintenance prevents small issues from escalating and extends the lifespan of your system significantly.
Conclusion
You’re now ready to enjoy smooth, soft water. By following these eight steps, you’ve laid a solid foundation for a well-functioning water softener. It’s like tuning a finely crafted instrument—each component must be perfectly in sync. Regular inspections and maintenance will keep your system performing at its best. Remember, the key to longevity is consistent care. You’ve got the expertise; let your water softener do its job effortlessly, providing pure, softened water daily.
Frequently Asked Questions
How Do I Dispose of the Old Water Softener?
To dispose of your old water softener, contact local recycling centers. They often handle such appliances. Be mindful of disposal costs. Proper disposal guarantees environmental safety and helps others by allowing parts to be recycled.
Can I Install a Water Softener, or Should I Hire a Professional?
Taking the DIY route can be rewarding, offering cost savings and hands-on experience. Nevertheless, hiring a professional guarantees precision and peace of mind, notwithstanding the higher costs. Choose based on your comfort with technical tasks.
What Should I Do if My Water Pressure Drops After Installation?
If your water pressure drops after installation, inspect the pressure regulator for pipe blockage. Clean or replace the pressure regulator if needed, and clear any obstructions in the pipes to restore proper flow.
Are There Any Warranties or Guarantees I Should Look for When Purchasing a Water Softener?
Imagine a magical warranty period where your water softener never fails! You should look for a long-term warranty period and a satisfaction guarantee that your investment serves others with reliable, softened water.
How Can I Tell if My Water Softener Is Working Correctly After Installation?
You can verify your water softener works correctly by monitoring usage and checking salt levels. Confirm the system regenerates as scheduled and test water hardness periodically. Consistent soft water indicates proper functionality.