
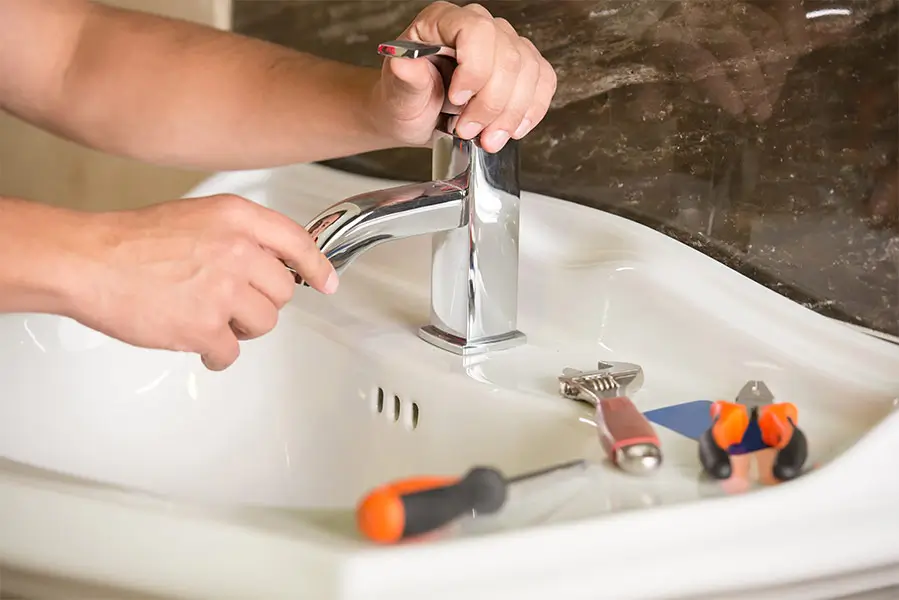
Like the little Dutch boy who plugged a dam leak with his finger, you too can quell the flow from a dripping faucet. But wouldn’t it be better to have a quick emergency repair guide at your fingertips? Imagine identifying the faucet type, assembling the right tools, and going through the repair steps confidently. You’d not only save water but also gain a sense of accomplishment. But what if the faucet’s inner workings seem more complex than you initially thought? We’ll tackle that and more, leaving you well-equipped for any faucet fiasco.
Identifying the Faucet Type
Before you can tackle the repair, it’s essential that you correctly identify your faucet type, as this determines the exact steps you’ll need to follow. There are four primary faucet types: ball, cartridge, disc, and compression. The identification process isn’t overly complicated, and a few telltale signs will aid you.
Ball faucets are standard in kitchens and have a single handle that moves over a rounded ball-shaped cap right above the base. Cartridge faucets can have one or two handles. If there are two, it’s a clear sign you’re dealing with a cartridge faucet. Disc faucets, conversely, have a single handle over a vast cylindrical body, which is your clue. Compression faucets are typically found in older homes. They have two handles, one for hot and one for cold, and when you turn them, you can feel the resistance as you compress a seal.
Gathering Necessary Tools
Once you’ve identified your faucet type, it’s time to gather the necessary tools for the repair job. Being well-prepared will save you time and potential frustration later.
First and foremost, you’ll need an adjustable wrench. This tool is invaluable for loosening and tightening parts of the faucet. A set of screwdrivers, both Phillips and flathead, will also be indispensable. They’ll allow you to dismantle the faucet if necessary.
Next, pliers will be handy for gripping small, stubborn parts. They can provide the leverage you need. You should also have a small flashlight on hand. This will be useful for illuminating dark spaces under the sink.
You’ll also need replacement parts. Depending on your faucet type, this might include a new washer, O-ring, or cartridge. Always check the manufacturer’s specifications to verify you have the correct parts.
Lastly, have a small bucket or bowl and some rags or towels nearby. These will be useful for catching any water drips and keeping your work area clean.
Shutting Off Water Supply
To prevent unwanted water flow during the repair, it’s essential to shut off the water supply to your faulty faucet. The first step is to locate the water shut-off valve. Typically, you’ll find it under the sink. If you cannot locate it there, check your basement or crawl space; it may be near your water meter.
Once you’ve located the valve, it’s time to turn it off. This usually involves turning the valve clockwise or to the right. If it’s a lever-style valve, move the lever perpendicular to the pipe; this indicates the water is off.
You must confirm the water supply is off before proceeding with the repair. You can do this by turning on the faucet. If the water stops flowing entirely, you’ve successfully shut off the water. If it doesn’t, you may need to turn the valve a bit more, or there could be an issue with the shut-off valve. If this is the case, you’ll need to shut off the main water supply to your home before proceeding with the faucet repair. Safety and preparation are key when serving others in their time of need.
Removing Faucet Handle
With the water supply successfully shut off, you’re ready to tackle the next step: removing the faucet handle. To do this, first, locate the screw that holds the handle in place. This screw is typically hidden under a decorative cap on the top or back of the handle. Use a flat-head screwdriver to carefully pry off the cap, being mindful not to scratch the handle’s surface.
Next, you’ll see the screw. You’ll need a Philips-head screwdriver or, in some cases, an Allen wrench to loosen it. Turn the screwdriver counterclockwise to loosen the screw. Remember, ‘righty tighty, lefty loosey.’ Apply steady pressure and be patient. You don’t want to strip the screw head, as this can make removal more difficult.
Once the screw is loose, you can lift the handle off the stem. It should come off quickly. Suppose it doesn’t; don’t force it. Instead, apply a handle puller or penetrating oil to loosen any mineral deposits causing it to stick. This careful approach will help guarantee that the faucet handle is removed without causing any additional damage.
Inspecting the Stem
Now that you’ve removed the faucet handle, it’s time to closely inspect the stem for any signs of wear or damage. This is a critical step in diagnosing your leaking faucet problem. Don’t rush through it, as the smallest signs of damage can cause your issue.
- Look for Visible Cracks: Hold the stem up to the light. Any visible cracks, no matter how small, can cause leakage. If it’s difficult to see, use a magnifying glass.
- Check for Stripped Threads: The threads on the stem connect it to the faucet handle. If these are stripped or worn down, the handle won’t secure properly, causing leaks.
- Inspect the O-Ring and Washer: The O-ring and washer are located at the bottom of the stem. They’ll need to be replaced if worn out or damaged.
Replacing Faulty Parts
After closely inspecting the stem and identifying any faulty parts, it’s time to get some replacements and begin the repair process. You must visit your local hardware store or order online for the appropriate parts. Be sure to take along the faulty part for reference. This will make it easier for you to find the exact match.
When you’ve got the replacement parts, you’ll want to clean the area where the old part was situated. A little vinegar on a rag can effectively remove residual grime. Once the area is clean, you’re ready to install the new parts.
Installing the new parts might seem tricky, but it’s not as difficult as it sounds. First, apply the plumber’s tape to threaded parts to guarantee a watertight seal. Then, you’ll place the new part in the correct position and carefully screw it in. Don’t tighten the part too much; just ensure it’s secure. Remember, your goal is to stop the leak, not to create a new one by over-tightening.
By replacing faulty parts, you’re not only fixing a problem but also serving your home and its inhabitants. This task demands patience, care, and precision.
Reassembling the Faucet
Once you’ve securely installed the new parts, it’s time to put your faucet back together, ensuring each piece fits snugly in its designated spot. This process requires careful attention to detail, as incorrect assembly can lead to more leaks and further damage. Patience and precision are key to success at this stage.
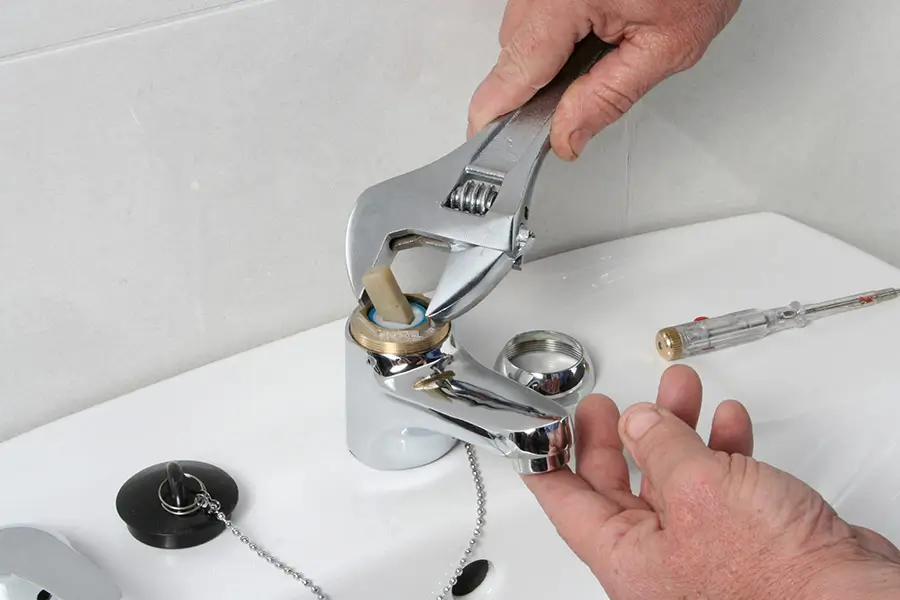
- Begin with the stem assembly. Gently insert it back into the faucet body, rotating it to confirm it fits correctly. Make sure you’ve aligned it properly before tightening it with your wrench. Remember, over-tightening can lead to damage, so use your judgment to secure it snugly but not excessively.
- Next, replace the packing nut. This significant piece helps prevent leaks, so it’s essential to make sure it’s screwed on tightly. Again, use your wrench to secure it, but avoid over-tightening.
- Finally, reattach the handle. Slide it onto the stem and tighten the screw that holds it in place. Make sure it’s secure but still able to move freely.
As you complete these steps, be mindful of the service you provide, not only to yourself but potentially to others. Faucet repair is a skill that can significantly aid those around you, saving precious water resources and reducing unnecessary expenses.
Testing for Leaks
Without a doubt, the moment of truth arrives as you turn the water back on to test your newly repaired faucet for any potential leaks. It’s a nerve-wracking but necessary step in the process. Don’t rush it. Turn the water on slowly, allowing it to flow through the faucet. Watch for any drips or water escaping from the areas you’ve worked on.
If your faucet remains dry, congratulations. You’ve successfully repaired your leak. Feel a sense of pride as your effort and time have paid off in service to others. However, if water starts to drip again, it’s not the end of the world. You’ve found a problem that wasn’t apparent before. This is a chance to refine your repair tactics.
Don’t get discouraged. Turn the water off, disassemble the faucet, and check the components. Look for any that may be worn or damaged. If you find any, replace them. Then, reassemble the faucet and test again. Remember, patience is key. Repeat the process as necessary until your faucet is leak-free. Your dedication to serving others through your work is commendable.
Necessary Precautionary Measures
Taking the correct precautionary measures is absolutely essential in ensuring your faucet repair process goes smoothly and safely. It’s not just about fixing the problem but also about maintaining your safety and prolonging your faucet’s life. Here are a few precautionary measures you need to take into account:
- Wear Protective Gear: Always wear gloves and protective eyewear when dealing with plumbing issues. This will protect your hands from sharp objects and your eyes from any unexpected splashes of water or debris.
- Shut Off The Water Supply: Before working on the faucet, shut off the water supply. This simple step can prevent a minor repair from becoming a big mess.
- Use the Right Tools: It’s vital to use the correct tools for the job. It’s not only safer, but it’ll also help you avoid causing further damage to your faucet.
Seeking Professional Help
Despite your best efforts, there may come a time when the faucet repair proves too complex for a DIY approach, and that’s when professional help comes into play. Don’t feel defeated; seeking expert assistance is better than risking further damage. A professional plumber has the skills, experience, and tools to handle tricky repairs.
Identifying when to call a professional is essential. If the leak persists despite your efforts, if you can’t pinpoint the source of the issue, or if you’re dealing with a major pipe or water pressure problem, it’s time to call in the experts. Remember, it’s not about your capabilities but about ensuring the job gets done safely and effectively.
Consider their reputation, experience, and pricing when looking for a plumber. Don’t be afraid to ask for estimates and references. A good plumber is transparent about costs, provides a warranty for their work, and respects your home. They’ll explain the problem, detail the repair process, and give you advice on preventing future leaks. So, when in doubt, don’t hesitate to call a professional. You’ll gain peace of mind knowing your plumbing is in good hands.
Conclusion
You’ve tackled your leaking faucet head-on, mastering the art of identification, disassembly, and repair. Don’t forget, though, sometimes it’s best to call in the pros. The smallest mistake could lead to bigger issues down the road. Stay vigilant for any signs of leakage post-repair. Remember, successful DIY plumbing isn’t just about fixing a problem; it’s about preventing future ones. Stay safe, be practical, and remember that your home’s health is yours.