
You’ve installed your new water heater, but you’re beginning to notice a few issues cropping up. Leaks, strange noises, and discolored water aren’t what you expected, are they? Don’t worry; these are common problems you can often fix yourself. By understanding how to address these issues, you’ll guarantee your water heater operates at peak performance and lasts as long as possible. Stick around as we discuss practical solutions to help you get the most out of your water heater.
Recognizing Water Heater Leaks
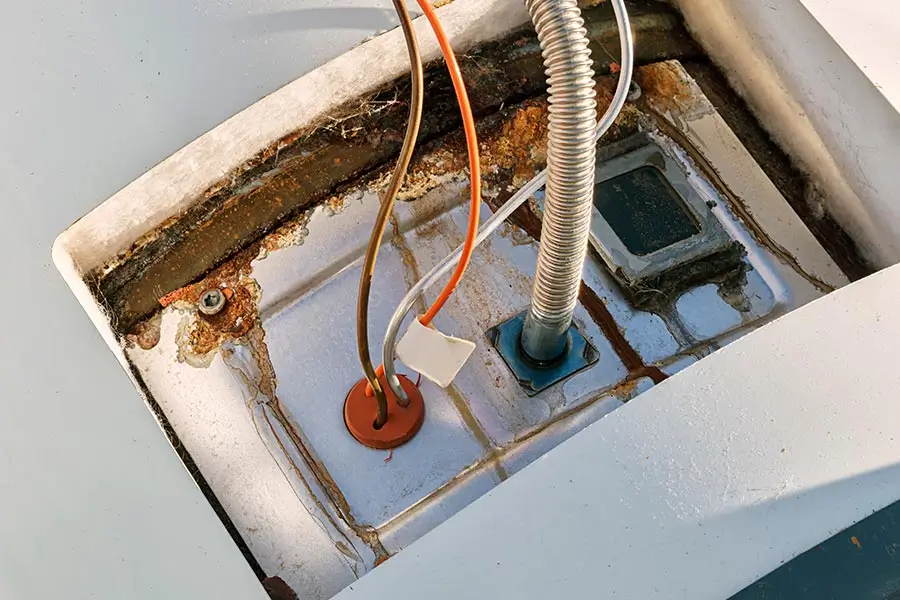
Spotting a leak in your water heater early is essential to prevent damage and costly repairs. You’ll need to inspect your unit regularly for any signs of leakage. Typically, leaks begin around the base or at the top, where the plumbing connections are located.
Look for small pools of water accumulating at the base of the unit. If it’s been a while since you installed your water heater, rust may have formed around the bottom, indicating a leak. Another sign is the presence of moisture or droplets on the pipes connected to the heater.
When examining the top of the unit, pay attention to the cold water inlet and hot water outlet connections. Check for any dampness around these areas. If you notice any, there’s likely a leak.
Remember, safety first. Verify the power supply is turned off before inspecting your water heater. Also, wear gloves to protect your hands and use a flashlight for better visibility if the area is poorly lit.
Early detection of leaks saves you money and helps you serve others better by preventing potential water damage to their property.
Dealing With Inadequate Hot Water
If you’re experiencing inadequate hot water, specific common issues with your water heater could be the culprit. You might find it’s not generating as much hot water as you need or reaching the desired temperature. Don’t worry; there are practical steps you can take to pinpoint and resolve these issues.
First, check the thermostat. It may be set too low. The US Department of Energy recommends setting it at 120 degrees Fahrenheit. However, if you’ve recently had a new water heater installed, it might have been set lower to prevent scalding. Adjust the thermostat and see if that resolves your problem.
Next, look at the size of your water heater. If it’s too small for your needs, it won’t be able to produce enough hot water. The capacity should match the size of your household and your typical usage. You may need to upgrade to a larger model if you’re constantly running out of hot water.
Lastly, examine your water heater for sediment buildup. Over time, minerals in the water can accumulate at the bottom of the tank, reducing the heater’s efficiency. Regular maintenance can help prevent this issue, enhancing the performance of your water heater.
Solving Unusual Noises Issue
While your water heater is meant to operate quietly, if there are complications after installation, you might start hearing unusual noises. These sounds can be alarming and often indicate an issue that needs your attention. The good news is that you can solve most of these problems with a little know-how.
Different noises can signal different issues. For instance, a high-pitched whining or hissing often means there’s sediment buildup in the tank. This happens when mineral deposits from hard water accumulate at the bottom, causing your heater to work harder and create noise. You’ll need to flush the tank thoroughly to eliminate the sediments.
On the other hand, a loud rumbling or popping noise usually suggests your water heater is overheating due to a faulty thermostat. As the water gets hotter than intended, it causes the tank to expand and contract, creating that unsettling noise. Check your thermostat settings and verify they’re at the recommended 120-140°F range.
If you hear a ticking or sizzling sound, it’s likely due to a leaking T&P (temperature and pressure) relief valve. To fix this, you’ll need to replace the valve. Always remember, these solutions aren’t just about maintaining peace and quiet—they’re essential for the longevity and efficiency of your water heater.
Addressing Discolored Water Problems
Should your water heater start producing discolored water, it clearly indicates an existing problem requiring immediate attention. This issue could be due to several factors, such as rust in your water heater, a deteriorating sacrificial anode rod, or a problem with your home’s plumbing.
First, check the water from other faucets. If the water is clear, it’s likely an issue with your water heater. If the discoloration persists in all faucets, your home’s piping might be the culprit.
At this point, you’ll want to inspect your heater’s sacrificial anode rod. This rod corrodes over time to protect the tank from rusting. If it’s severely corroded, replacing it might solve the problem.
If the rod is in good condition, your heater might rust internally. Draining and flushing the tank can help, but the heater typically needs replacement if rust has formed.
Lastly, if the discoloration is due to your home’s plumbing, it’s best to consult a professional plumber. They can assess the situation and recommend practical solutions to guarantee the safety and cleanliness of your water supply. Remember, addressing discolored water problems promptly can prevent further damage and cost.
Handling Low Water Pressure
Another common issue after a water heater installation is low water pressure. This problem can manifest in various ways, such as a weak shower stream or a slow-filling tub. It’s crucial to tackle this issue promptly to guarantee your water heater functions efficiently.
First off, check your main water valve. It’s possible it’s not fully open, which can restrict water flow. Turn the valve counter-clockwise to open it fully and see if that improves your water pressure.
If that doesn’t work, inspect your pressure relief valve. This valve on your water heater regulates pressure within the tank. If faulty or incorrectly set, it can cause low water pressure. You’ll need to replace or adjust this valve to resolve the issue.
Lastly, sediment build-up in your water heater could also be the culprit. Over time, minerals from your water can accumulate inside the tank, obstructing water flow and reducing pressure. Regularly flushing your water heater can prevent this problem and maintain peak pressure.
Overcoming Water Overheating
If you suddenly scald during your morning shower, it might indicate that your water heater is overheating. This issue isn’t just a discomfort but a potential safety hazard as well. Luckily, there are a range of practical solutions you can employ to overcome this problem.
A primary strategy is to adjust the thermostat on your heater. Most models have a dial that you can turn to set the desired temperature. It’s recommended to keep it between 120 and 140 degrees Fahrenheit. Here’s how you can do this:
- Turn off the power supply to your water heater.
- Locate the thermostat – it’s typically behind an access panel.
- Using a screwdriver, carefully adjust the temperature dial.
- Turn the power back on and check if the water temperature has normalized.
Fixing the Pilot Light Outage
Occasionally, you may find that your water heater’s pilot light has gone out, halting your heated water supply. Don’t panic; the solution is often straightforward.
Firstly, make sure your gas supply is working correctly. Check other gas appliances in your home. If they’re not working, you’ve found the issue and should call your gas company.
If the gas is refined, look for the pilot light aperture at the bottom of the heater. It’s often covered by a small removable metal plate. Remove it, and you should see a small blue flame if it’s lit. If not, turn the heater’s gas control dial to ‘pilot.’
Next, hold down the ‘reset’ or ‘ignite’ button (depending on your model) while you light the pilot aperture with a long match or lighter. Once it’s lit, press the button for about a minute before releasing it. This gives the thermocouple time to heat up and signal the gas valve to stay open.
Controlling Excessive Condensation
Excessive condensation on your water heater can lead to rusting, mildew growth, and other unwanted issues, so it’s crucial to understand how to control it effectively. Controlling condensation is about maintaining the heater’s efficiency and ensuring safety for everyone who uses it.
To manage this, consider these practical steps:
- Regularly inspect your system: Make it a routine to check for signs of condensation. Spots of water, dampness, or a musty smell are tell-tale signs.
- Adjust the thermostat: A too-low or too high temperature can cause condensation. Aim for a moderate setting, typically between 120-140°F.
- Insulate your heater: Using insulation blankets or jackets can help maintain a stable temperature and reduce condensation.
- Install a condensate drain: This helps collect and safely dispose of the condensation.
Treating Rusty Water Heater
While controlling condensation is essential, you might also face another common issue with your water heater – rust. Rusty water from your heater can be alarming, but it’s a problem that can be tackled effectively.
Firstly, you’ll need to determine if the rust is coming from the water heater or the pipes. To do this, drain a few buckets of hot water from your water heater. If the water is still rusty by the third bucket, the issue lies in your heater. If it’s clear, the pipes are likely the culprit.
Now, if your water heater is the source of the rust, you’re dealing with a corroded tank. Tanks corrode due to prolonged contact with water and air, causing rust. Unfortunately, once a tank begins to rust, it can’t be repaired and must be replaced.
However, you can prevent this issue by installing a sacrificial anode rod in your new water heater. This rod attracts the corrosive elements, sparing your tank. Replacing the anode rod every few years can prolong the life of your water heater and prevent rusting.
Managing Short Heater Life Span
One major problem you might face after installing a new water heater is its short lifespan. This is often the result of several factors that you can manage effectively. Understanding these factors can help you avoid unnecessary breakdowns and prolong the life of your water heater.
Consider these essential maintenance strategies:
- Regular Flushing: Sediment builds up over time and can cause your heater to work harder, reducing lifespan. Flushing the tank yearly keeps it running efficiently.
- Pressure Relief Valve Check: This valve reduces excess pressure in the tank. Make sure it’s functioning correctly to avoid damaging your heater.
- Anode Rod Inspection: This rod attracts corrosive elements, protecting the tank. Replace it every 3-5 years to prevent corrosion.
Insulation: Wrapping your heater in an insulation blanket reduces heat loss, increasing efficiency and lifespan.
Conclusion
In principle, your water heater’s performance mirrors a well-oiled machine when handled with care. Don’t let leaks, low water pressure, or off-colored water throw you off course. You’re steering this ship smoothly with regular check-ups, timely fixes, and careful monitoring. Remember, your vigilance is the guardian angel that keeps your heater’s lifespan long and its performance exceptional. Don’t forget to call in the pros when things get too hot to handle.